Editing the XML file that defines the UI layout for this app. XML stands for eXtensible Markup Language, which is a way of describing data using a text-based document. Because XML is extensible and very flexible, it's used for many different things, including defining the UI layout of Android apps. Other resources like strings for your app are also defined in an XML file called strings.xml
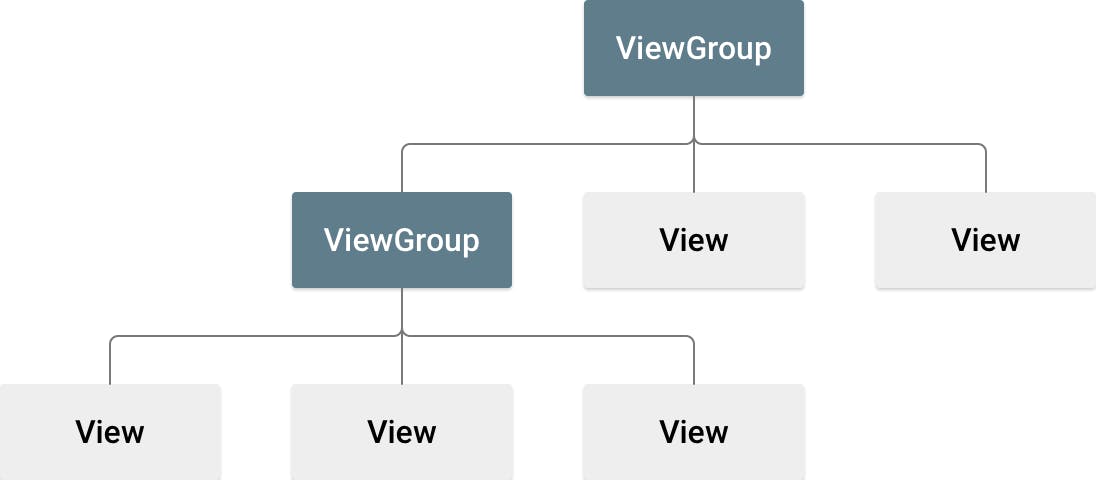
The UI for an Android app is built as a containment hierarchy of components (widgets), and the on-screen layouts of those components. Note those layouts are UI components themselves.
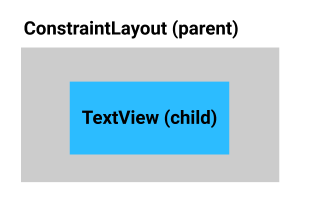
You describe the view hierarchy of UI elements on the screen. For example, a ConstraintLayout (the parent) can contain Buttons, TextViews, ImageViews, or other views (the children). Remember, ConstraintLayout is a subclass of ViewGroup. It allows you to position or size child views in a flexible manner.
 Containment hierarchy of an Android app
NOTE: The visible UI hierarchy is based on containment, ie, one component has one or more components inside of it. This is unrelated to the hierarchy of classes and subclasses that you learned earlier. The terms parent and child are sometimes used, but the context here is talking about parent views (viewgroups) containing children views, which in turn can contain children views.

Each UI element is represented by an XML element in the XML file. Each element starts and ends with a tag, and each tag starts with a < and ends with a >. Just as you can set attributes on UI elements using the Layout Editor (design), the XML elements can have attributes, too. Simplified, the XML for the UI elements above might be something like this:
<ConstraintLayout>
    <TextView
        text="Hello World!">
    </TextView>
</ConstraintLayout>

<androidx.constraintlayout.widget.ConstraintLayout>
    <TextView
        android:text="Hello World!" />
    <Button
        android:text="Calculate" />
</androidx.constraintlayout.widget.ConstraintLayout>
More about XML for layouts
- Look at the tag for the ConstraintLayout, and notice that it says androidx.constraintlayout.widget.ConstraintLayout instead of just ConstraintLayout like the TextView. This is because ConstraintLayout is part of Android Jetpack, which contains libraries of code which offers additional functionality on top of the core Android platform. Jetpack has useful functionality you can take advantage of to make building apps easier. You'll recognize this UI component is part of Jetpack because it starts with "androidx".
- You may have noticed the lines that begin with xmlns:, followed by android, app, and tools.
xmlns:android="http://schemas.android.com/apk/res/android" xmlns:app="http://schemas.android.com/apk/res-auto" xmlns:tools="http://schemas.android.com/tools" - Whitespace between XML elements doesn't change the meaning to a computer, but it can help make the XML easier for people to read.
- You can add comments to XML, just like you would with Kotlin code. Start .
<!-- this is a comment in XML --> <!-- this is a multi-line Comment. And another Multi-line comment --> - Note the first line of the XML file:
<?xml version="1.0" encoding="utf-8"?>Note: If there's a problem with the XML for your app, Android Studio will flag the problem by drawing the text in red. If you move the mouse over the red text, Android Studio will show more information about the problem. If the problem isn't obvious, look at the indenting and color coding, and they may give you a clue to what is wrong.
Note: The name of the constraints follows the form layout_constraint_toOf, where refers to the current view. refers to the edge of the target view that the current view is being constrained to, either the parent container or another view.
Note: A resource ID is a unique resource name for the element. When you add a View or other resource with the Layout Editor, Android Studio automatically assigns resource IDs for them. When you manually type out the XML, you need to explicitly declare the resource ID yourself. New view IDs in your XML file must be defined with the @+id prefix, which tells Android Studio to add that ID as a new resource ID. Choose descriptive names for resources so you know what they refer to, but they should be all in lowercase letters, and multiple words should be separated with an underscore. When you refer to resource IDs in your app code, use R..; for example, R.string.roll. For View IDs, the is id, for example, R.id.button.
Note: You cannot use match_parent for any view in a ConstraintLayout. Instead use 0dp, which means match constraints.
Summary
XML (Extensible Markup Language) is a way of organizing text, made of tags, elements, and attributes. Use XML to define the layout of an Android app. Use EditText to let the user input or edit text. An EditText can have a hint to tell the user what is expected in that field. Specify the android:inputType attribute to limit what type of text the user can input into an EditText field. Make a list of exclusive options with RadioButtons, grouped with a RadioGroup. A RadioGroup can be vertical or horizontal, and you can specify which RadioButton should be selected initially. Use a Switch to let the user toggle between two options. You can add a label to a Switch without using a separate TextView. Each child of a ConstraintLayout needs to have vertical and horizontal constraints. Use "start" and "end" constraints to handle both Left to Right (LTR) and Right to Left (RTL) languages. Names of the constraint attributes follow the form layout_constraint_toOf. To make a View as wide as the ConstraintLayout it's in, constrain the start and end to the start and end of the parent, and set the width to 0dp.

