Android Studio is the official Integrated Development Environment (IDE) for Android app development based on JetBrains IntelliJ IDEA. With Android Studio, you can develop apps for all Android devices. Latest update was Android Studio Arctic Fox | 2020.3.1 following IntelliJ IDEA version 2020.3.1.
Features offered by Android Studio to enhance your productivity when building Android apps, such as:
- A flexible Gradle-based build system
- A fast and feature-rich emulator
- A unified environment where you can develop for all Android devices
- Apply Changes to push code and resource changes to your running app without restarting your app
- Code templates and GitHub integration to help you build common app features and import sample code
- Extensive testing tools and frameworks
- Lint tools to catch performance, usability, version compatibility, and other problems
- C++ and NDK support
- Built-in support for Google Cloud Platform, making it easy to integrate Google Cloud Messaging and App Engine.
Installation
In the first place, you need to download the Android Studio installer. You should simply visit the official Android Developers site, click the button "Download Android Studio", and consent to the agreements. After the download is done, launch the file.
Open the installer document and click on "Next". You will see a rundown of parts you can introduce. It is prescribed to install the Android Virtual Device (AVD). With this tool, you will actually want to run and test your applications directly on your PC. On the off chance that your PC doesn't meet the prerequisites , you can essentially uncheck this choice.
Then, select the folder where you would like to have your Studio. Wait for the installer to extract everything it needs onto your machine. After that, launch Android Studio.
You will be asked to import settings. If it is your first time using Android Studio, just press "OK", and the setup wizard will pop up. Now you can choose the type of setup: Standard or Custom.
Choose "Standard" if you don't want to deal with a bunch of settings, and the IDE will do all the work for you. If you choose "Custom", you will be able to select where you would want to have your Software Development Kit (SDK) and whether you want to have your Virtual Device set up right away.
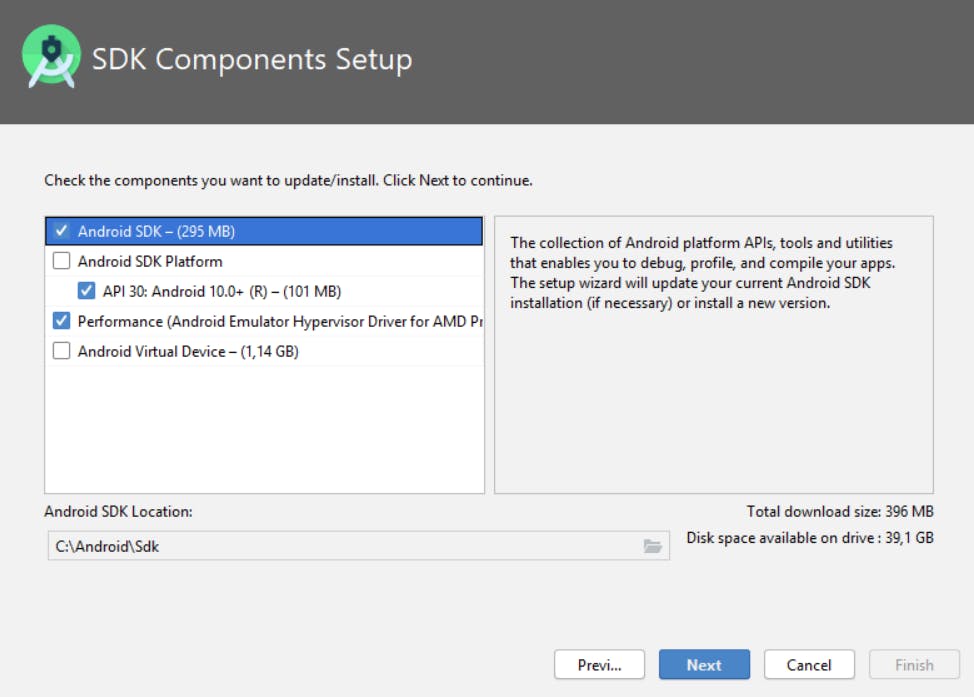
We're almost there! Now, Android Studio will download all the required files. When that is done, click "Finish". Congrats: you have successfully installed Android Studio!
After opening the IDE, you will be greeted by the Start screen:
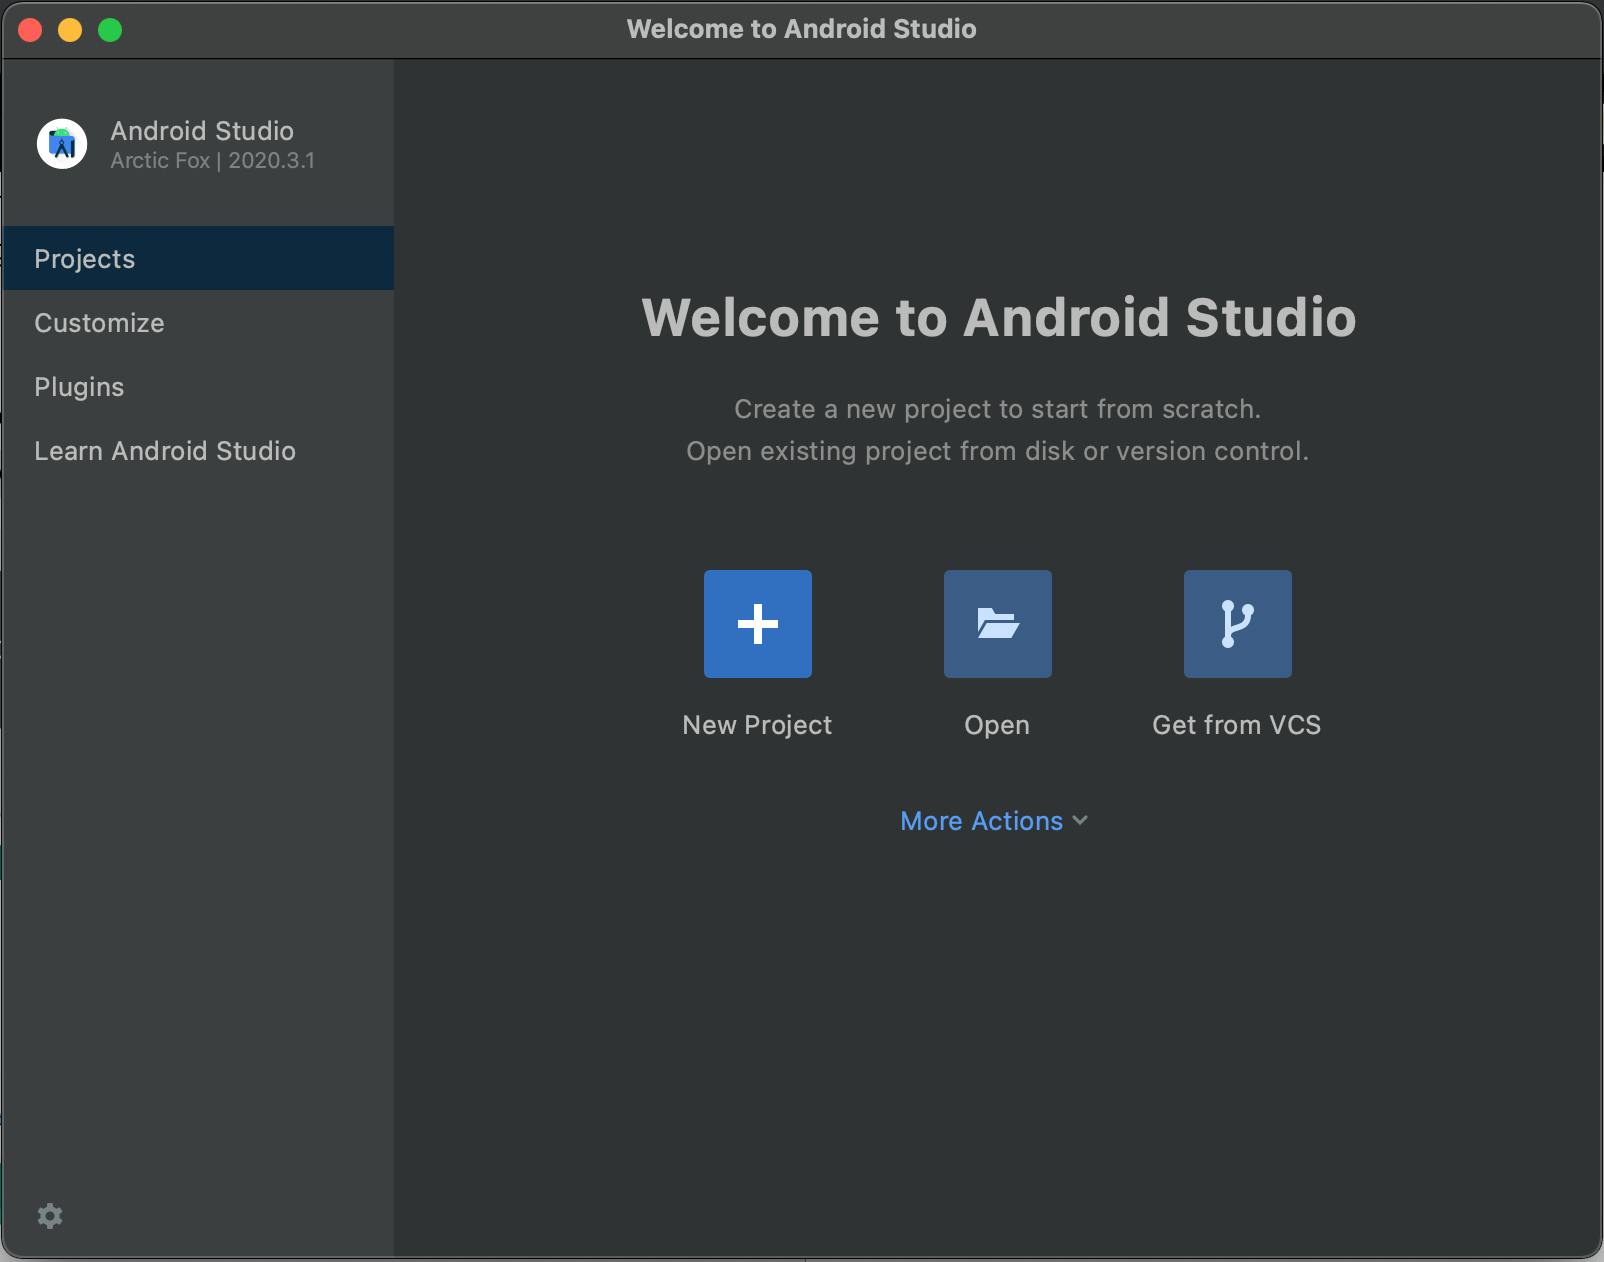
Here, you can see the most commonly used features of this screen. You can create a new Android Studio project by pressing the corresponding button, or open an existing project from your computer. Also, by pressing the "Configure" button you will be able to quickly access the main IDE settings such as changing the theme or the font size, installing new plugins, and so on.
Create first project
Create a new project and see what the main window looks like:
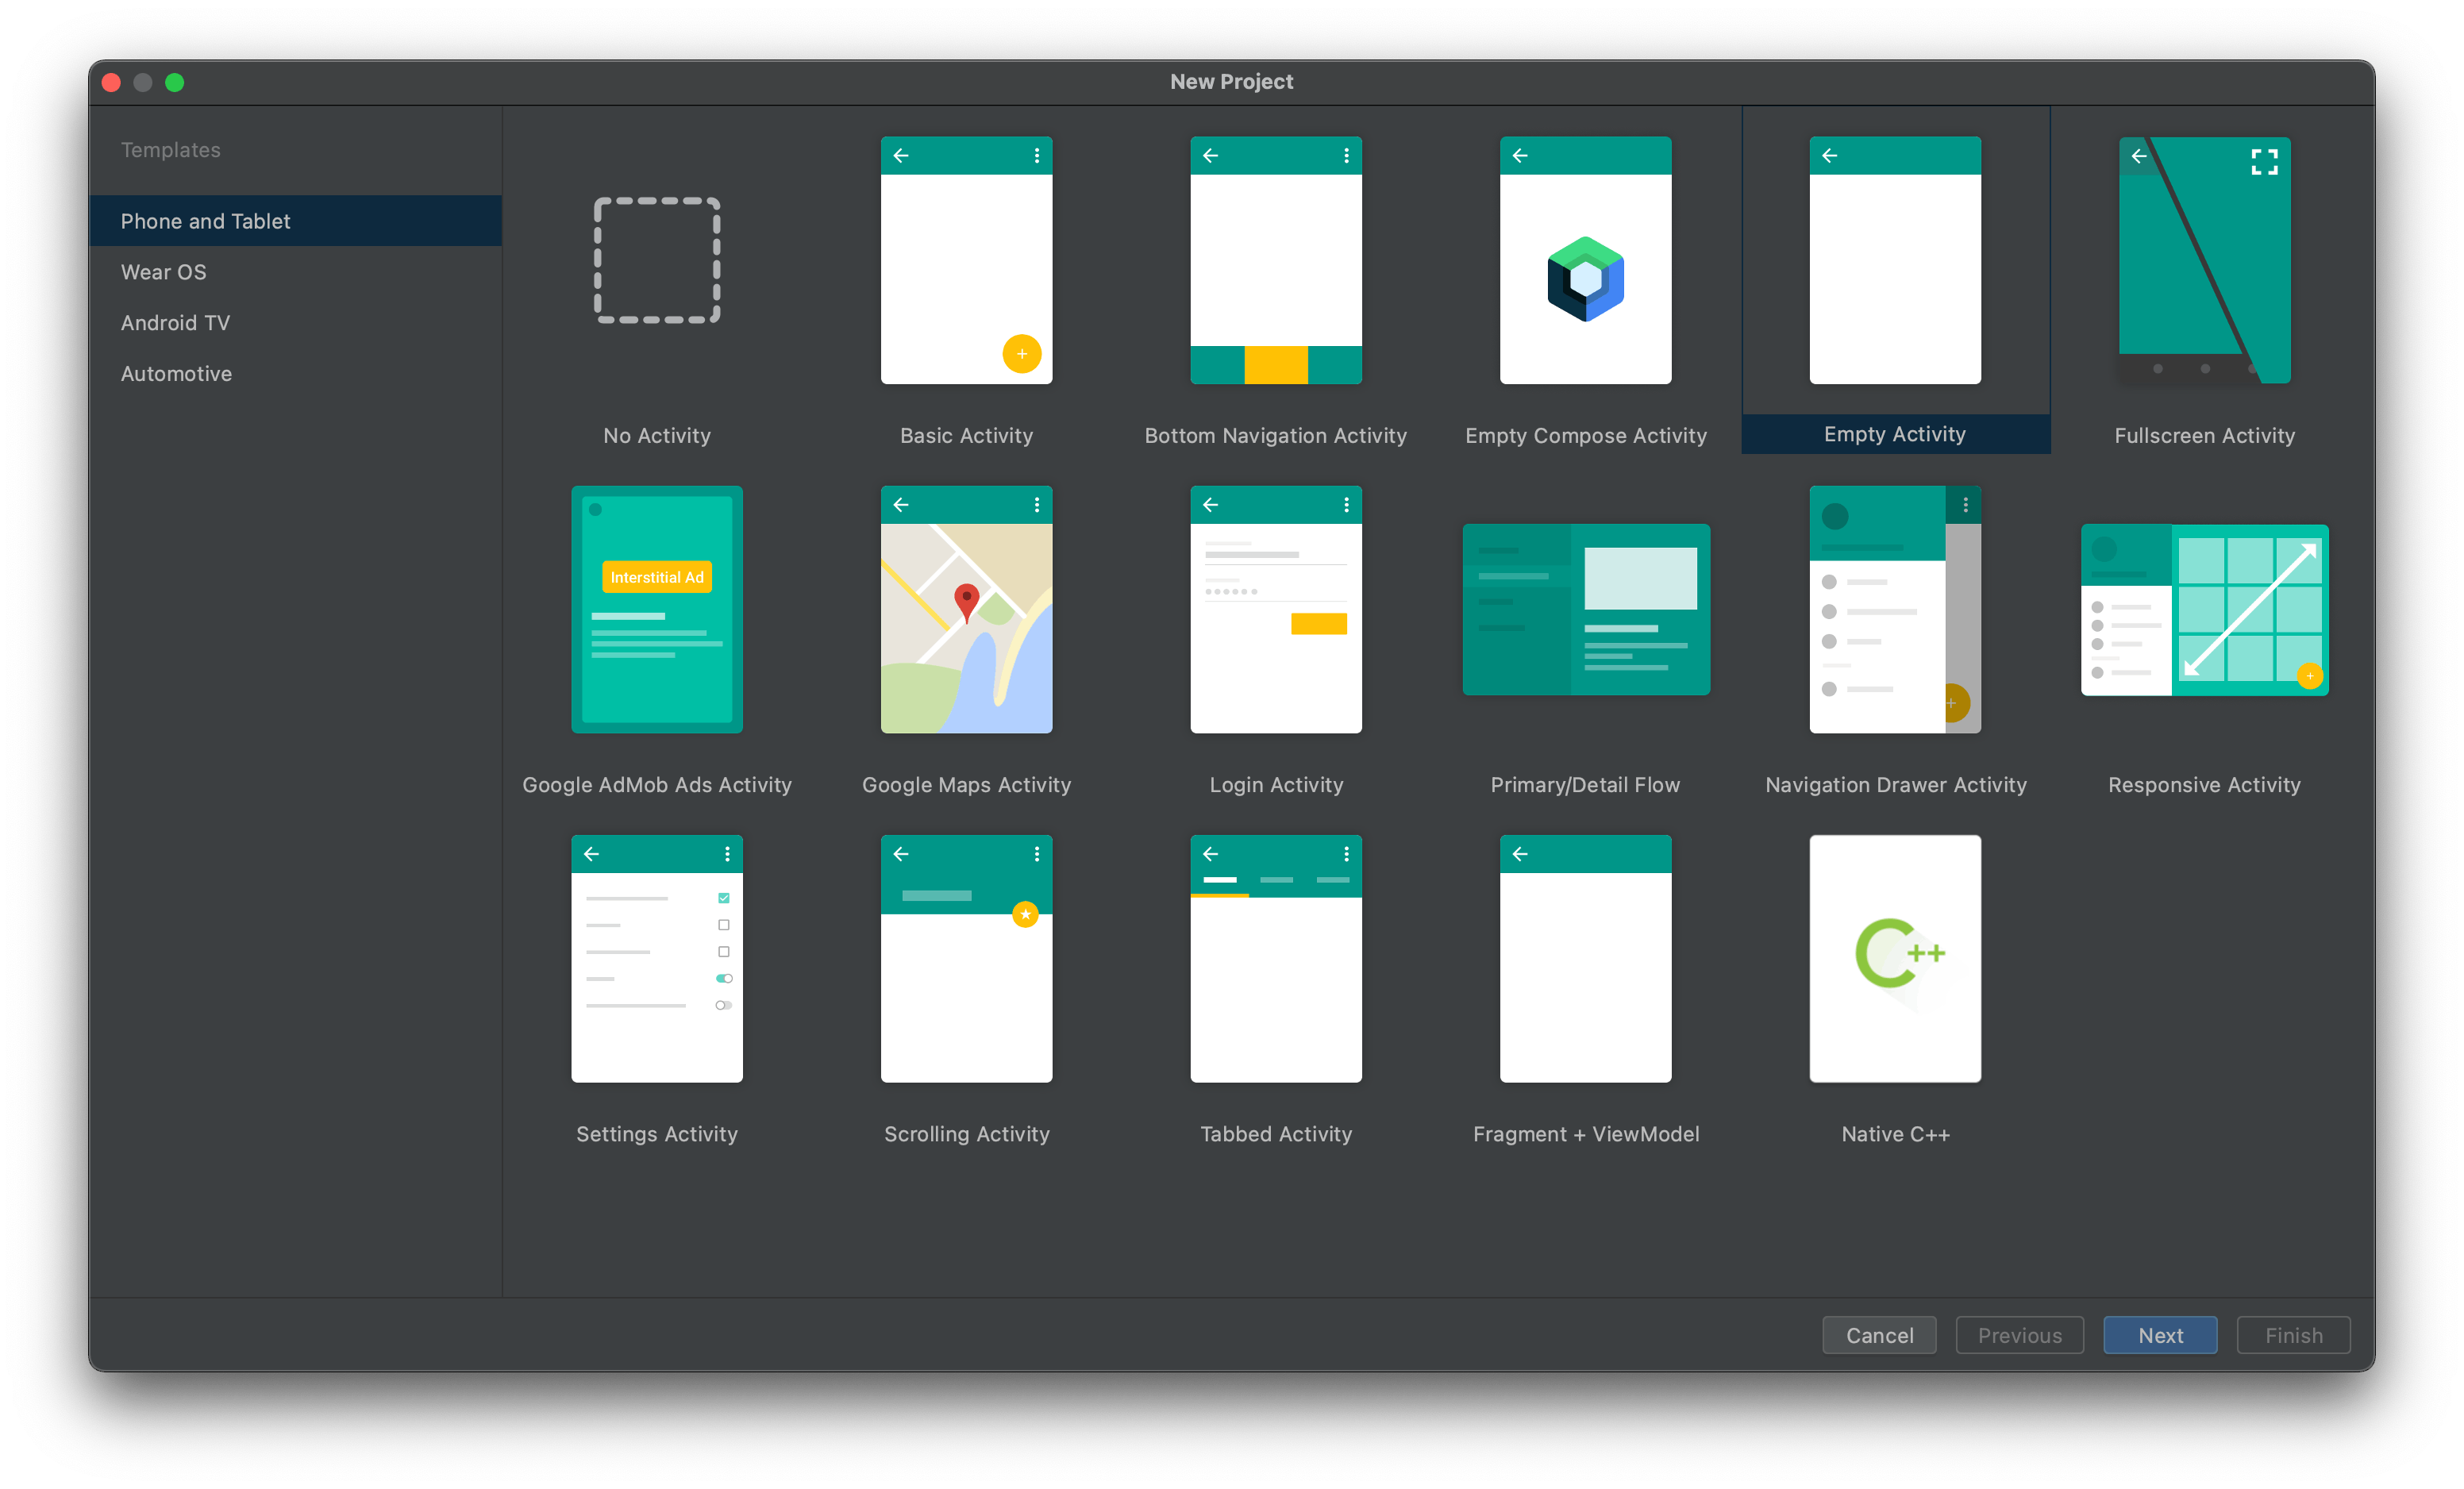
- Select Empty Activity, click on "Next"
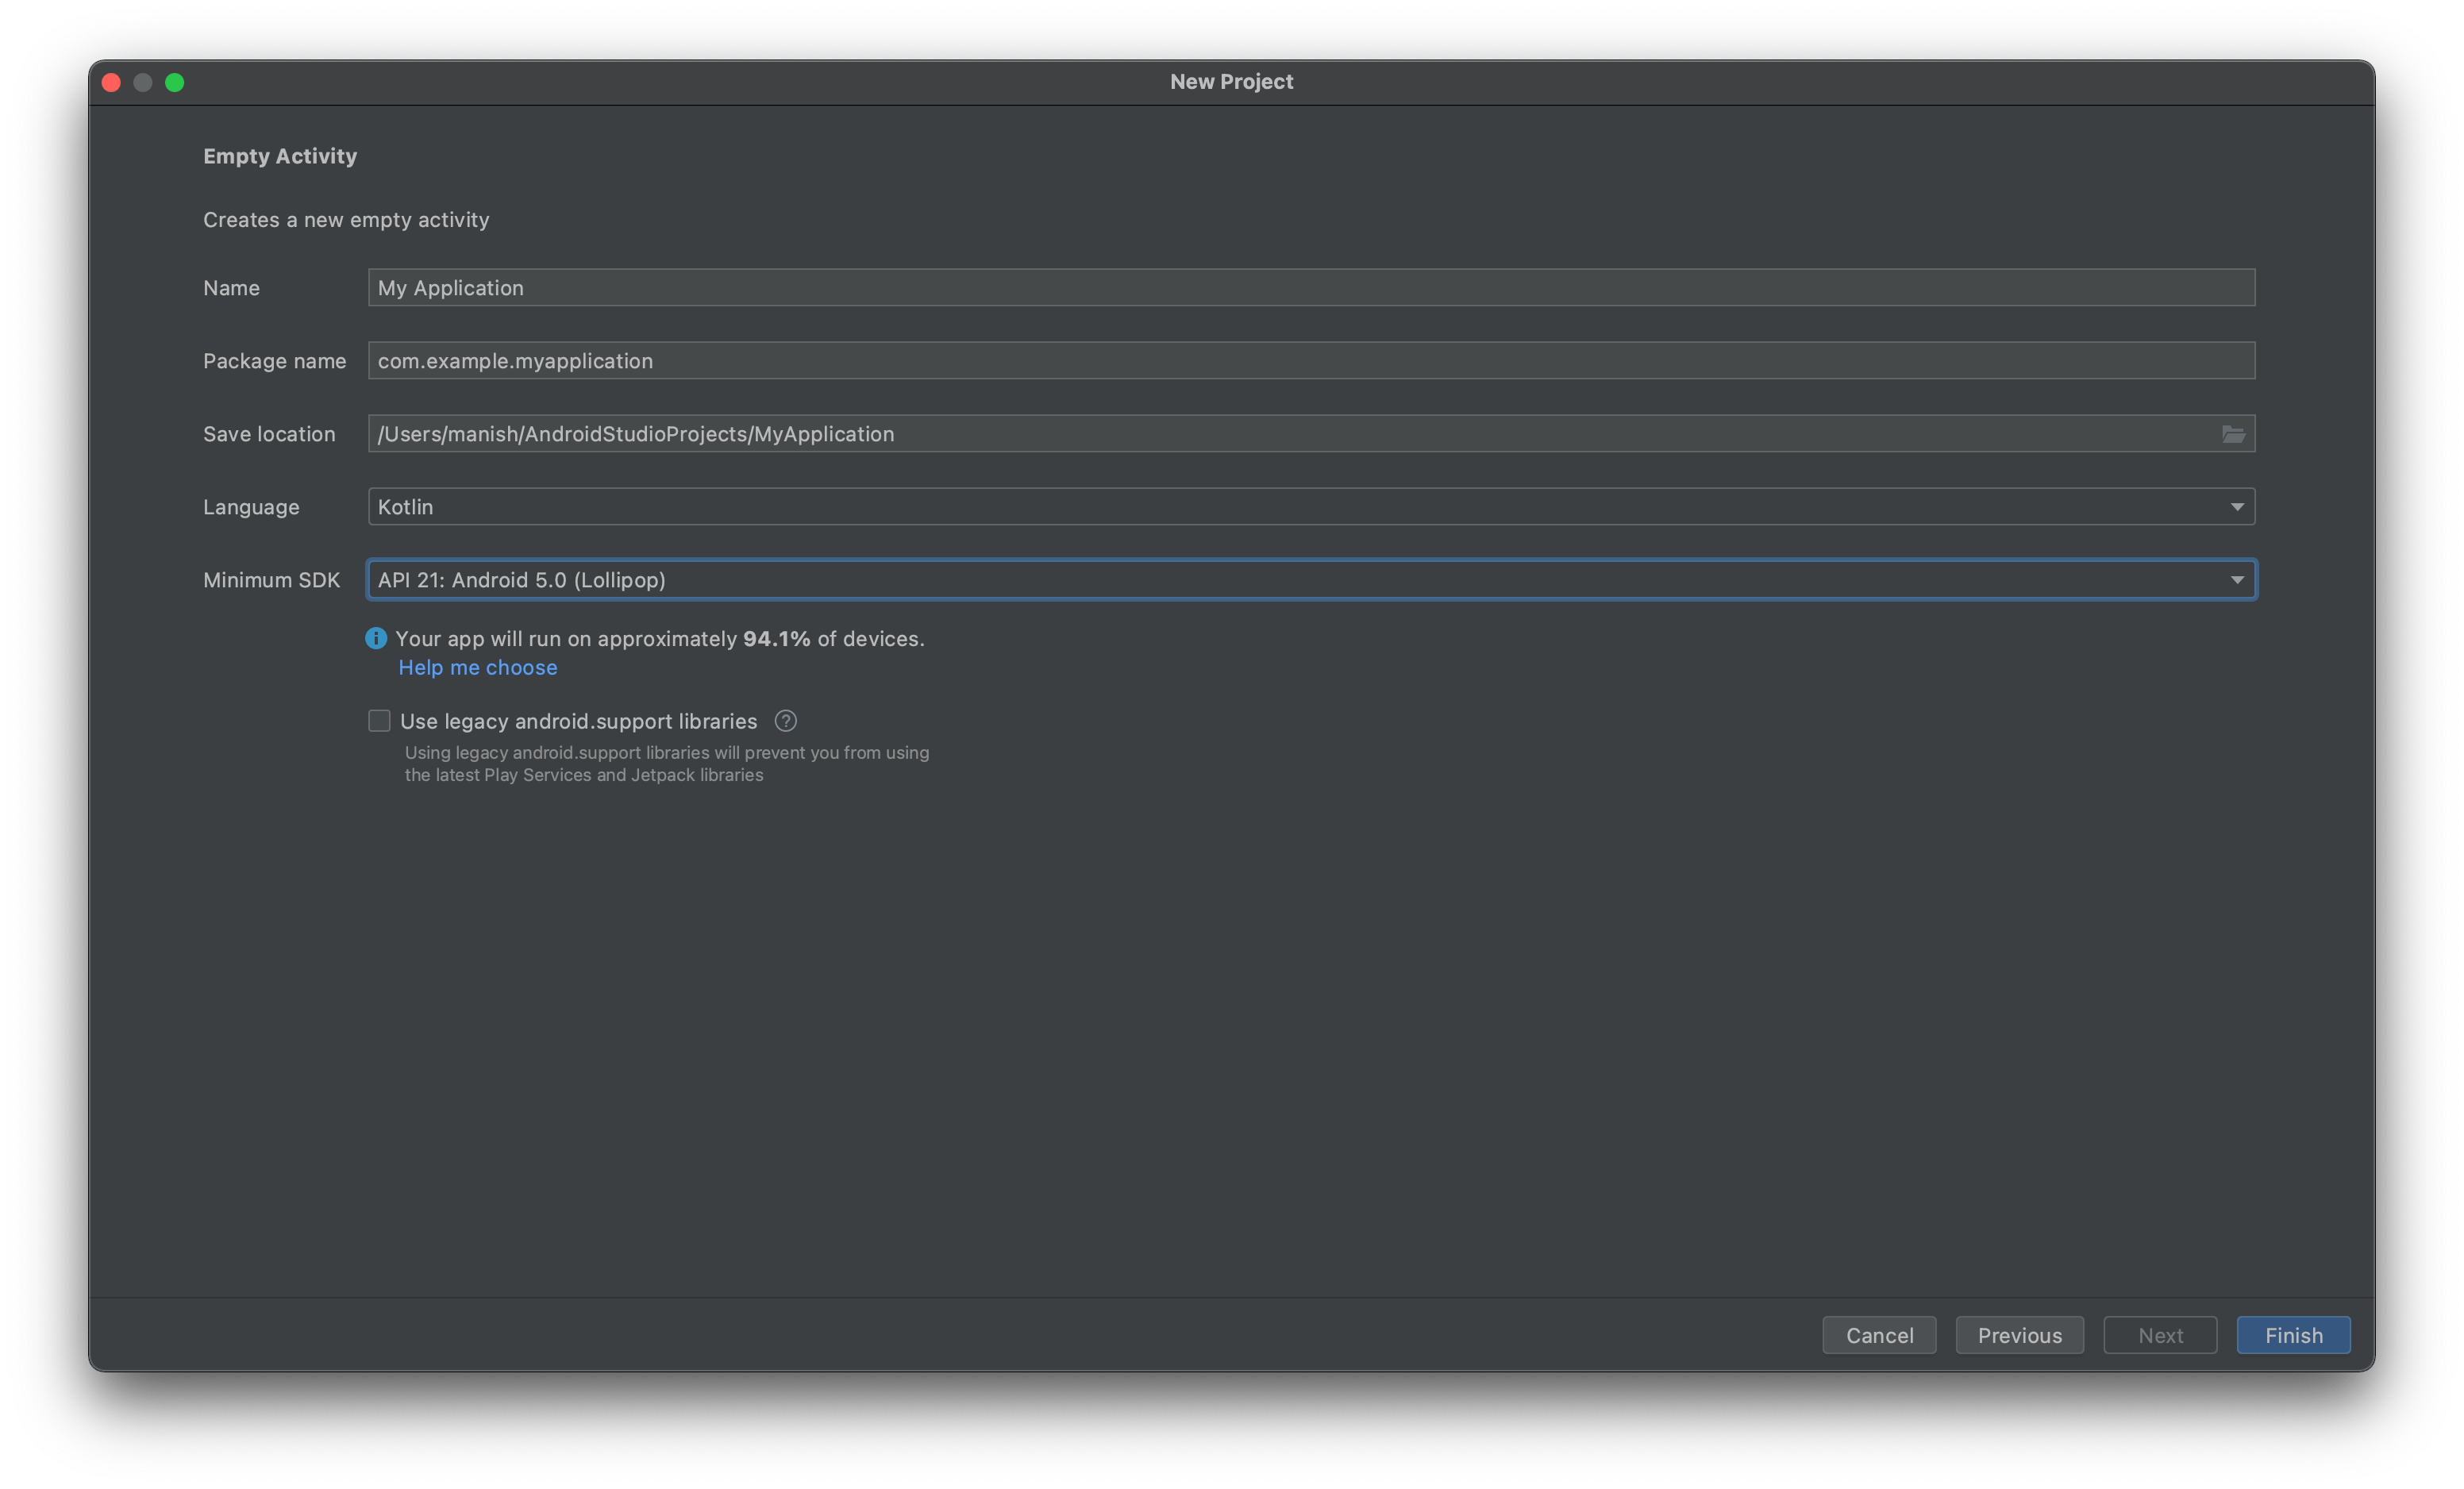
- Enter App Name, Package Name, Project location in your PC/Laptop, Language (Kotlin/Java), Minimum SDK supported by your application, click on "Finish". Vola, your new project is created.
Choose a name for your project. Then, set the project saving location and the programming language for your app. Enter your company or your nickname in the "Package name" field. Usually, it looks like "domain.companyname.appname".
After that, you need to choose the minimum SDK version that your app will support. Choose wisely: do not select the most recent or a very old version of Android. Really old versions are hard to maintain and have fewer users, and brand new versions also have a limited number of users. Play around with different SDK versions and pay attention to the percentage of devices that will be able to run your app. As of 2020, the best option is probably API 21-23.
Click "Finish". Congratulations, you have successfully created your project! Android Studio will build your project and you will see the Main window:
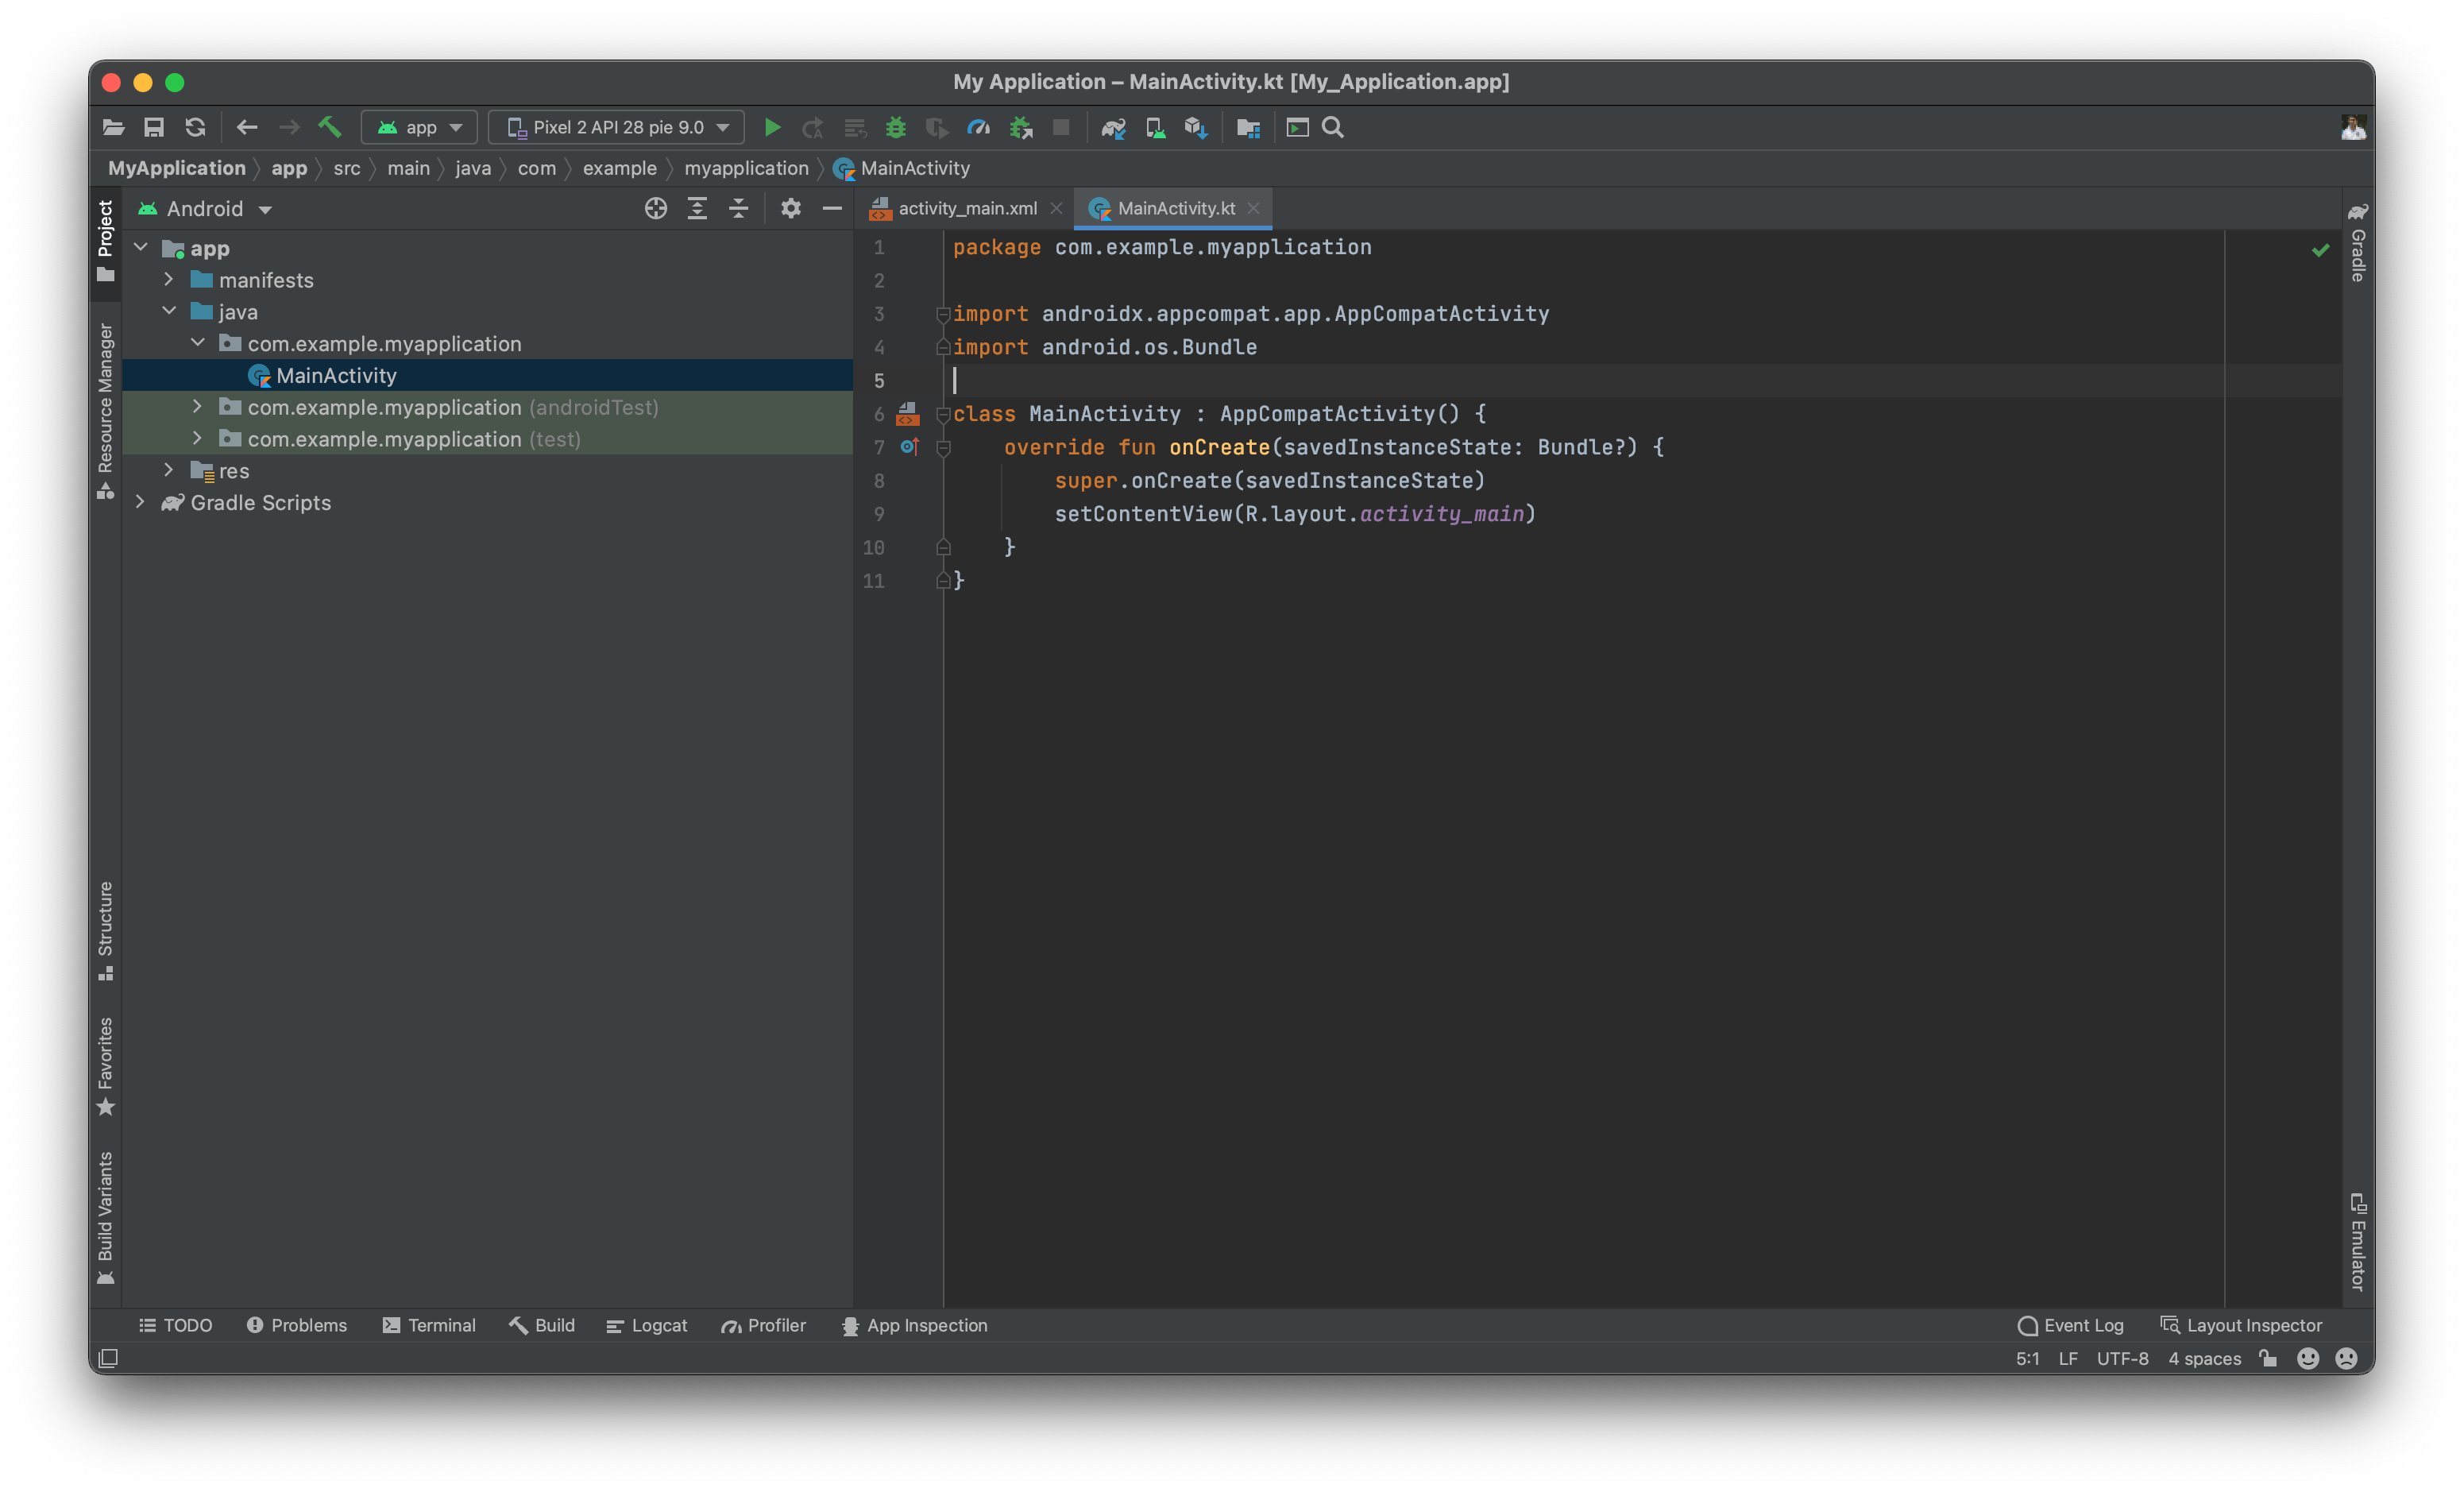
At first sight, this might look a little confusing, but don't worry: you'll figure it out step by step.
On the left side, you can see your Project View. It gives you quick access to your resources, code, and build files. Your code is located in the "java" folder, and your project assets such as pictures, icons, fonts, and texts are located in the "res" folder. If you don't want to be distracted from your code, you can always hide your Project Structure by clicking the "Project" button on the left sidebar.
On the right side, you will see your open files. This is called the Editor window. You can switch between your files in the navigation bar.
At the top, you can see the path to the file you've opened and a toolbar. Toolbar lets you do a whole variety of actions such as building, debugging, and running your app. It also has a lot of useful Android tools that will help you in the development process later on.
Look at all these buttons all around your IDE's window: these are the tools that give you access to specific tasks like search, version control, device files, and more. The most used ones are "Logcat", "TODO", and "Terminal".
The status bar is located at the bottom. There, you can see the status of your IDE and project. All warnings, hints, and messages are shown in the status bar.
More updates on Android Studio Artic Fox here -> Link
